Few days ago I open up my laptop and clean it.I made a small tutorial to help other people to do something similar if they have this laptop.
I have a Asus A72J / K72Jr. This is a 17.3 inch / I5 / ATI HD5470 1G / 4Gb DDR3 / 500Gb laptop.
My problem was that I noticed that the temperature was quite high 50-55C and the fan was running almost continuously. From my past experience with laptops and PC, I know that usually when this happens it is the cooling that is not efficient any more. Usually is the fan that is not blowing enough air , or the heatsink is dirty or simply the thermal grease that transfer the heat is dried.
In my case it was the thermal transfer to the heatsink that was not efficient anymore. My laptop is approx 3 years old and this is somehow expected to happen.
So what I describe here are the steps to replace the thermal grease from CPU+GPU .
Please do not try this is you are not familiar with PC repairs. I show this here just to help other people that may need to know how to do it. The operations are easy but you need patience, calm and to be careful. For me the entire process took approx 3 hours.
So first open the HDD+RAM compartment : 4 screws on the back.
Remove only the HDD. The RAM is not necessary to be removed.
Then remove the keyboard.
To remove the keyboard you have to push the small 5 pins from the top side of the keyboard , on top of key : ESC, F5, F9, Prt.Sq, and END.
Be careful with the keyboard flat cable.
The keyboard:


Then you have to remove the 5 screws that are under the keyboard. They are numbered 1 to 5.
Then remove the screws from the back side of the laptop .
The are many screws:
– 2 of them hold the DVD unit – marked with CD/DVD (disk) symbol.
– 5 screws are in the HDD/RAM compartment
– The others are in the holes on the back of the laptop.
Then remove the 4 small screws marked with “A” that are under the battery compartment. I forgot to mention , but is evident, that from the beginning you have to remove the battery first !
Now , separate the front side of the laptop from the bottom side.
With the fingers create a gap and be careful not to scratch the front side. The front is kept with some simple plastic clips. Do not pull too hard since on the back of the front side is a small flat cable for the touchpad.
After you remove the front side you will have something like this:


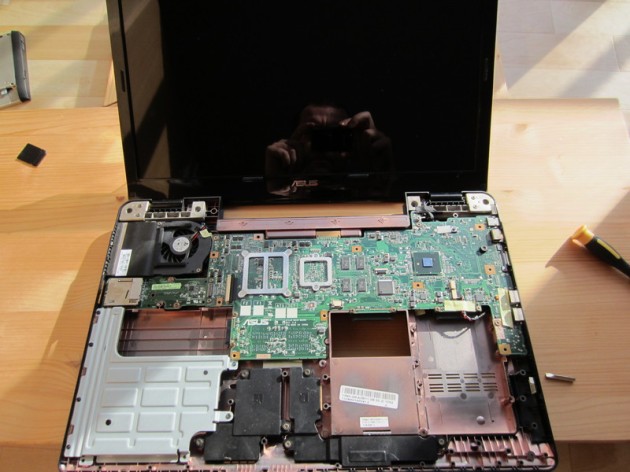
Now you should see the motherboard and the fan.
The screen is always attached to the back side and is not necessary to be removed. It is better to cover the screen with something to avoid scratches.
 One thing that I noticed immediately is that the mainboard controller is not having good thermal contact with the heatsink. His heatsink is the big aluminium plate that is under the keyboard. I fixed this by adding thermal grease ( see it in the pictures below).
Now you have access to the fan and his radiator.

In my case the fan and the radiator was clean.
If you need to fix only the fan then you can remove the 2 small screws . Then with a knife separate the metal plate that is under the fan by the plastic black top side. On the lateral of the fan you will notice small teeth. Be careful not to bend it too much since this is simple aluminium. If the fan do not fit well in his case it may make noise or vibrate.
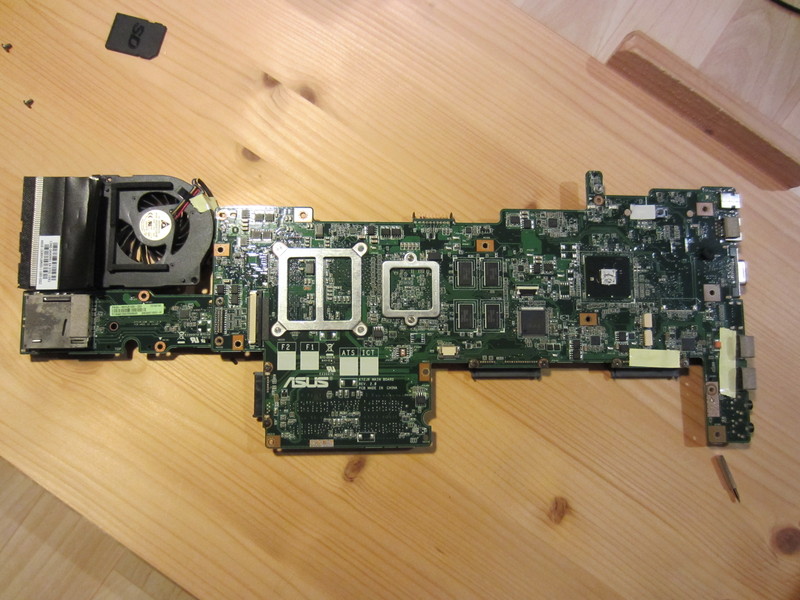
In my case I continued with opening and removing the mainboard from the case.
To do this you have to remove ONLY the screws marked with white triangle. The are 2 on the small board that has SD card reader, other 2-3 on the main board.
Then remove the 2 screws from the fan.
Then remove the GND/earth screw from top-right corner that is near the screen connector.
The mainboard is easy to lift up and you have to be careful to the screen connector ( top right side) and speakers connector (right middle side – twisted pair cable)
At the end this is what you should obtain:

The fan and the small SD card board are always connected with the mainboard. Do not remove them ! not yet anyway.
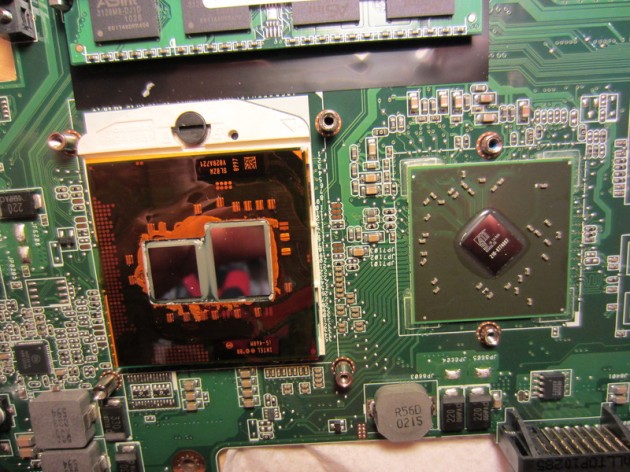
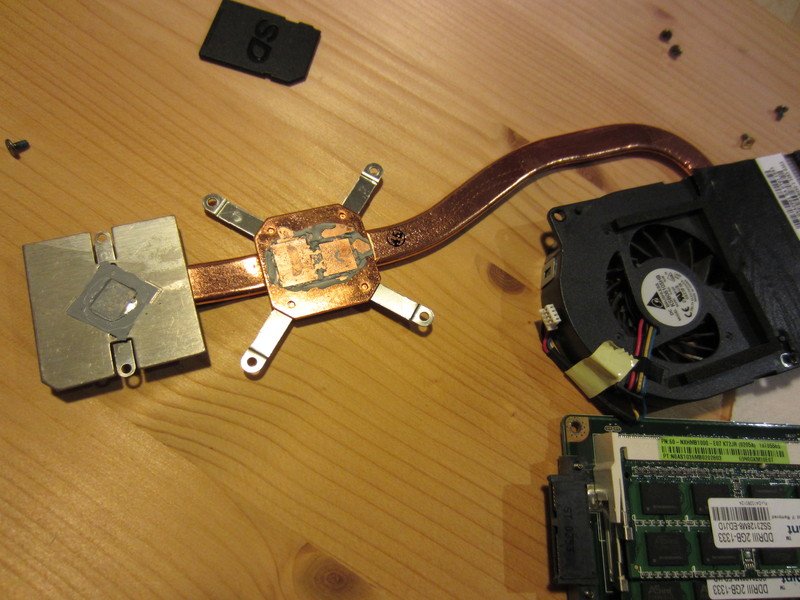
This is the back side of the mainboard and the CPU and GPU are visible.

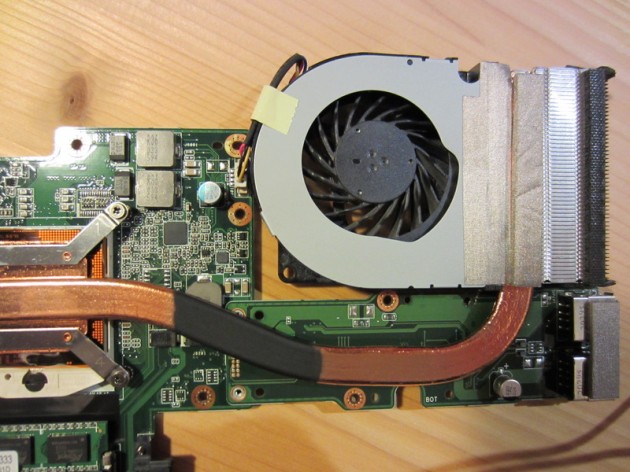
Next step is to remove the big copper heatsink and the fan from the CPU+GPU.
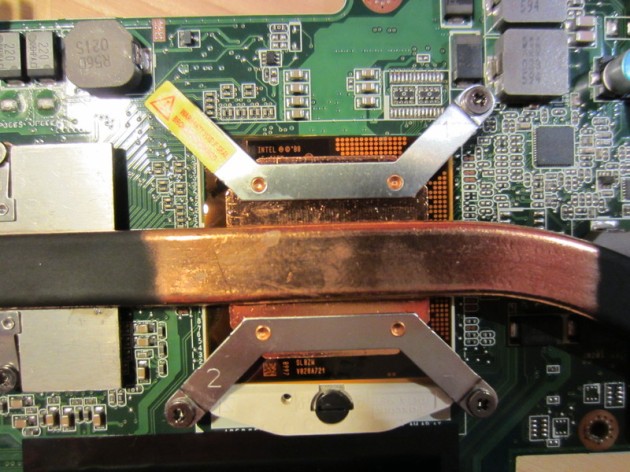
Remove first the connector of the fan and then remove the 4 screws from CPU and the 2 screws from GPU.
Be careful not to bend the copper thick heatsink or to force too much pressure on the mainboard or the CPU/GPU.
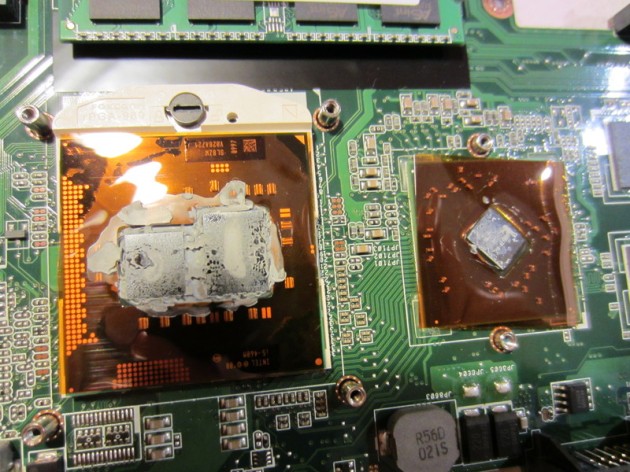
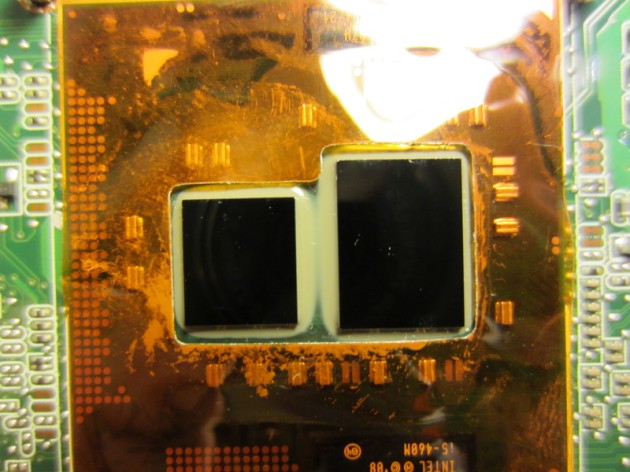
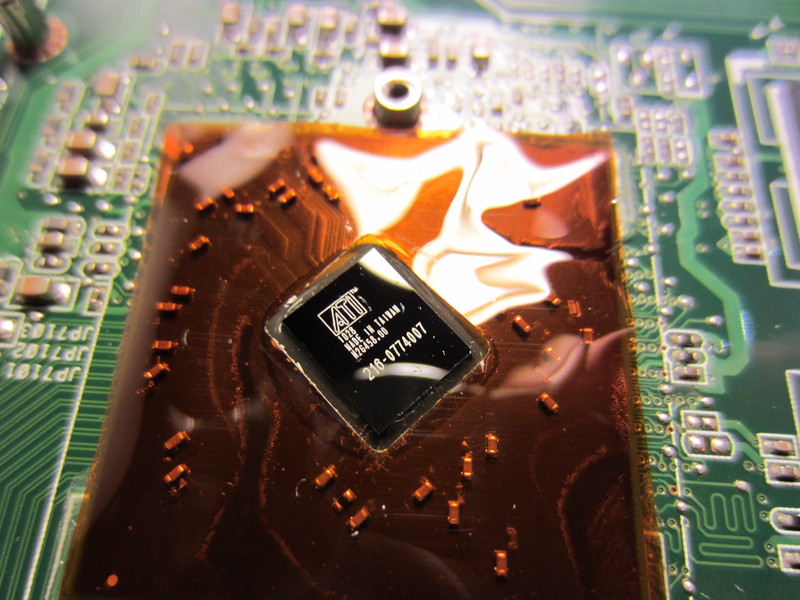
The next steps are the cleaning of the old thermal grease and replacing it with a new one.
I cleaned the CPU and the copper heatsink with kitchen paper towels and alcohol. This process take a lot of time and attention. Do it in well illuminated places and with no dust.
Do not use chemicals and to not put your (dirty) fingers on CPU or GPU.
When you clean the CPU/GPU do NOT use sharp objects !
Do not use metal objects ! you can scratch the CPU/GPU core and KAPUT !
If the old thermal grease is hard to remove you can use wood sticks (matches) and alcohol. Do not use fabrics/cloths that can generate dust/lint/debris !
Do not remove the CPU from his socket !
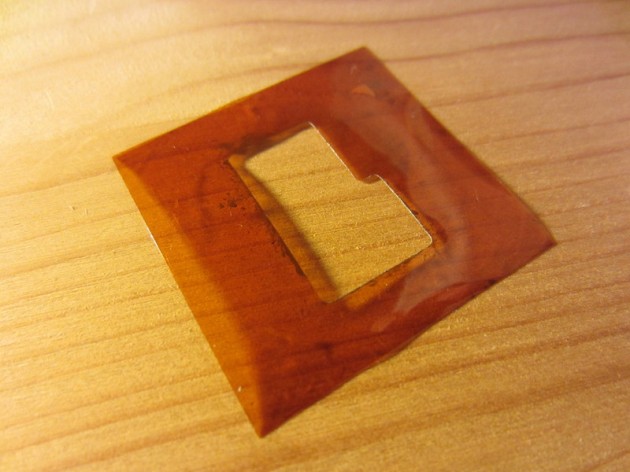
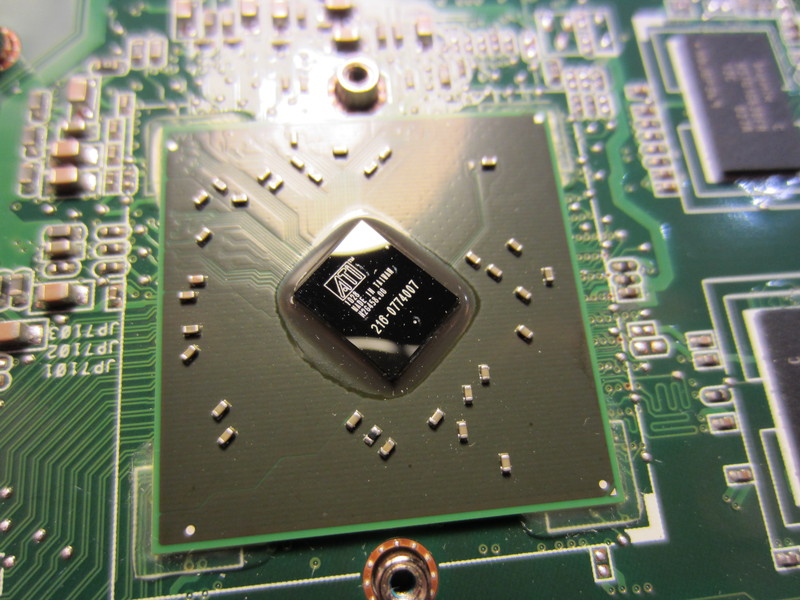
I noticed that GPU and CPU were covered by a red plastic cover (look like a adhesive isolation) , probably to isolate a possible contact between metal heatsink and the metal parts from CPU/GPU.
Some pictures from cleaning ( in chronological order):


After the cleaning I added new thermal grease on the CPU and GPU and also on the copper heatsink:

Then I mounted all in the reverse order of the disassembly ( see order above). Pay attention to the screws of the CPU , see order 1-2-3-4 from heatsink ! Put equal pressure and do not force them too much !
All works fine now, the CPU/GPU are at approx 40-45C and the fan works only from time to time. Of course this is for idle . But even for paying HD movies the GPU is only 50C and CPU 50C also. So I’m happy with the results.
As you can see from above pictures the GPU ( ATI) and CPU (i5) are having a common heatsink and that why the temperature is almost identical on both of them.
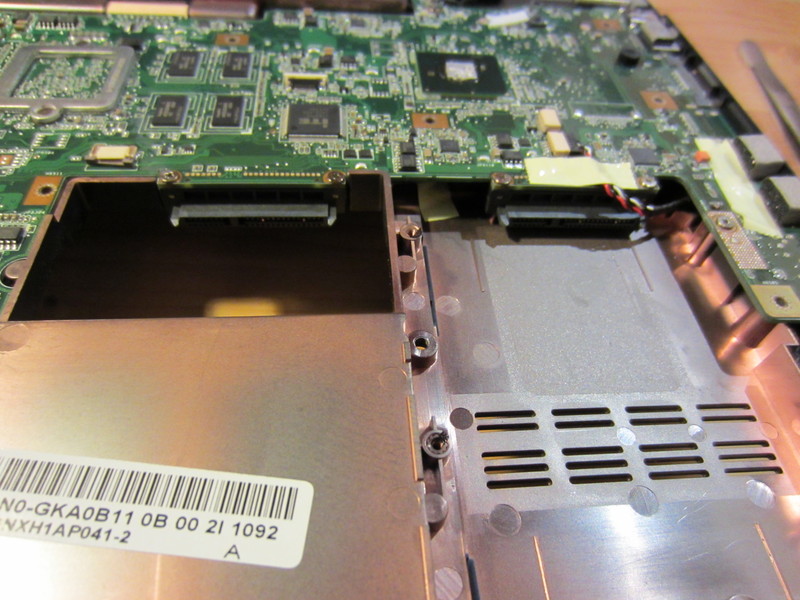
As a side note I observed also that the mainboard have a secondary SATA connector and an additionally space for a second HDD.
This is interesting since a secondary HDD can be added. In my case I so not need it, but it may be a useful info for guys that want to use two HDD or a combination SSD and HDD.
I did not tested if the second SATA connector is functional.
The disadvantage of using this hidden connection is that you have to remove the front face/side of the laptop to have access to it.


Plz make a video of this. Great job!
Thank you so much. This description is very precise. I will try to do the same today. My CPU temprature is around 90C and GPU temp. is around 80C, if I am using VmWare. If i am not my CPU is around 65-70C.
Thanks for the deep explanation.
Can you say what thermal grease did you use for this machine?
Hi,
I used the usual grease for CPU ( cheap tube from amazon)
any thermal grease will anyway dry-up in 3-4 years..
Thanks a lot! What heat conduction have your grease (could you say its name)? Does every grease dry up or they are some exceptions?
The secondary sata port is fonctionnal at 100%. Same average speed test by swaping SSD+HDD combo, SSD and HDD speed stayed the same before and after swapping them.
Would advise you to put the SSD in the internal right port, and HDD in the one easilly accessible, cause of the air-grid. HDD usually run hotter than SSD, and are more sensitive to heat.
Just sayin’
I have K72 jk and temperatures were staying in the 90 C with fan always at full speed when streaming video.
I changed once before with artic silver but the GPU had allot around the chip but hardly any on the chip and heat sink.
This time used Thermal Grizzly Kryonaut and the spreader method.
While at it, I upgraded from 430M CPU to i5 580M which was $13 used. (The paste cost me the same as the CPU ha ha. )
One week in and max average temperature when streaming video is 70C and fan will now vary speed. It runs in 50-60C range otherwise.
While the second SATA is working, how can I secure the drive? The mounting bracket does not seem to fit nor have any screw posts to match up. Without the bracket the HDD plugs in and functions but I would be afraid any bare drive could partially loosen in transit.
How can it be secured as it is a pain to take apart. Less work than replacing Thermal Grease but many screws.
As for putting SSD vs HDD , I was thinking HDD as I would not be using as much if getting SSD and there is ventilation ports over that area. I would set the power management to turn off drive after non use in a shorter time frame.
If anyone has issues with putting Windows 10 on this model like I did, I found help with drivers found here. http://ivanrf.com/en/latest-asus-drivers-for-windows-10/ I had system crashing until I downloaded as many updated drivers. The one I needed to update the most was the ATK driver. After that I did not have issues. I still had issues with the most up to date elan touch pad drivers